Notice: This Wiki is now read only and edits are no longer possible. Please see: https://gitlab.eclipse.org/eclipsefdn/helpdesk/-/wikis/Wiki-shutdown-plan for the plan.
Difference between revisions of "OSEE/Users Guide/Features"
(→PostgreSQL Installation) |
(→Derby Installation) |
||
| Line 125: | Line 125: | ||
=== Derby Installation === | === Derby Installation === | ||
| + | |||
| + | COMMING SOON | ||
| + | |||
=== PostgreSQL Installation === | === PostgreSQL Installation === | ||
Revision as of 22:53, 20 April 2009
What is OSEE
The [Open System Engineering Environment (OSEE)] project provides a tightly integrated environment supporting lean principles across a product's full life-cycle in the context of an overall systems engineering approach. The system captures project data into a common user-defined data model providing bidirectional traceability, project health reporting, status, and metrics which seamlessly combine to form a coherent, accurate view of a project in real-time. By building on top of this data model, OSEE has been architected to provide an all-in-one solution to configuration management, requirements management, testing, validation, and project management. All of these work together to help an organization achieve lean objectives by reducing management activities, eliminating data duplication, reducing cycle-time through streamlined processes, and improving overall product quality through work flow standardization and early defect detection.
Installation and Initialization
Requirements
System Requirements (non-Eclipse)
- System with at least 1GB of RAM
- Java Runtime Environment (JRE) 1.6 or higher
- Relational Database such as PostgreSQL, MySQL, Oracle, or Derby. See instructions for installing 'Supported Databases' to complete this step.
Eclipse Dependencies
- An Eclipse 3.4.1 base with the following features installed you can which featuers are already installed from Help -> About Eclipse Platform ->Feature Details * org.eclipse.gef and org.eclipse.draw2d * org.eclipse.datatools.connectivit.oda.feature and org.eclipse.datatools.enablement.oda.feature * org.eclipse.birt.chart.runtime The easiest solution is the Ganymede Eclipse install Eclipse IDE for Java and Report Developers since it provides the above Eclipse dependencies. Unzip the contents of this zip file into a (short) path on you computer to create your Eclipse base.
- OSEE add-ons - Visit external site under the section "Add-On Features" From the Eclipse base installed in the previous step, launch the update manager and install the add-ins archived update site (no need to unzip it). For more detail, see step-by-step 'Update Manager Instructions'. Note: To use OSEE with a database other than Derby, you will need the JDBC Drivers included in the OSEE add-ons distributed from the external location. Such a scheme of distribution is caused by licensing requirements.
Eclipse Installation
OSEE can be installed from within Eclipse using update manager. All the user should do is point update manager to the remote or local update site. To install OSEE:
-
Start Eclipse and select menu item 'Help > Software Updates...'

-
Select the 'Available Software' tab group and click the 'Add Site...' button.

-
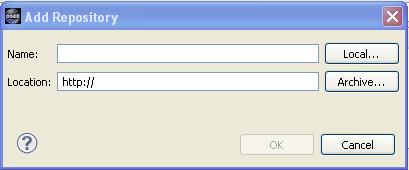
On the 'Add Site' dialog enter the URL to the 'Add-On' update site. The proper URL can be found on
http://www.eclipse.org/osee/downloads.php. If the update
site is marked as an archived site, you will need to download the archived update site to your local file system, and add the
path to the 'Add-Site' dialog by using the 'Archive' button. If the update site is not marked as an archived update site then
copy the URL listed in the downloads page directly into the 'Add-Site' dialog.
- Please note that the use of the software you are about to access may be subject to third party terms and conditions and you are responsible for abiding by such terms and conditions.
-
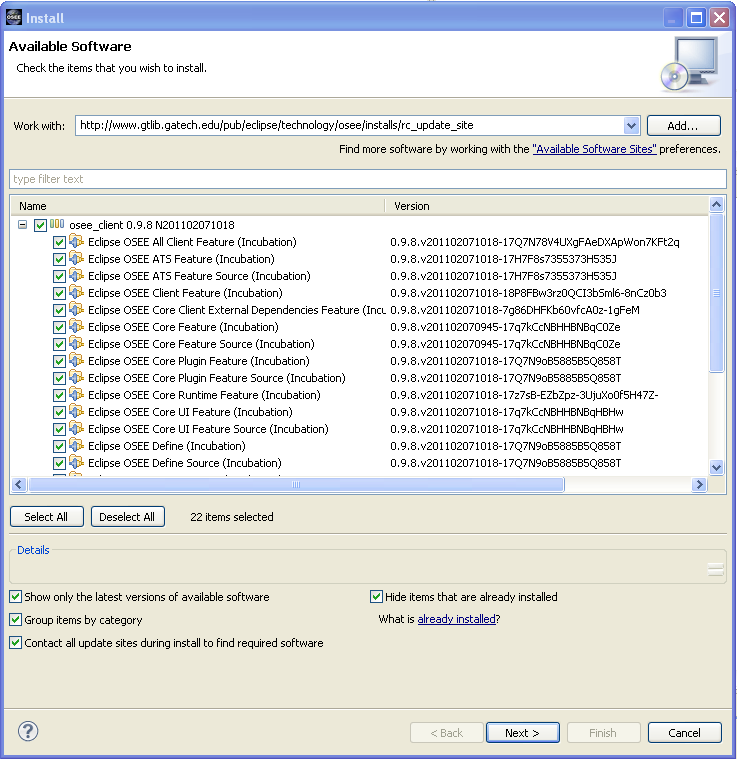
Select the OSEE update site entry and all features listed under its category. Click the 'Install' button.
-
The update manager calculates dependencies and offers you a list of features to install. Select the needed ones and click the 'Next >' button.

-
Accept terms of license agreement and click the 'Finish' button in order to start the download of selected features.
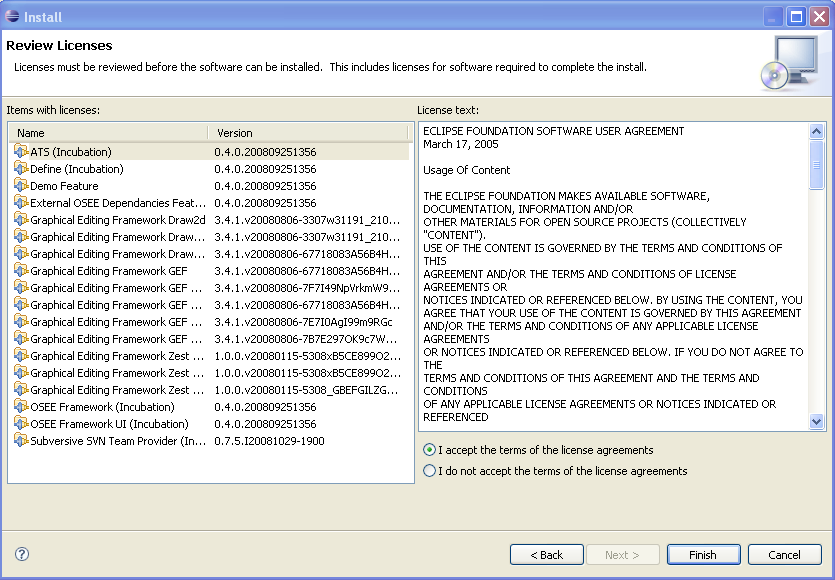
-
To apply installation changes click on the 'No' button and shutdown Eclipse. It is important that you don't restart Eclipse until
you have completed the database initialization steps below.

-
Before you can use OSEE you will need to install a relational database. Follow the instructions at
<a href="supported_databases.php">'Supported Databases'</a> to complete this step.
-
Initialize the database with default OSEE data <a href="db_init.php">'Database Initialization'</a>
-
Setup config.ini and launch eclipse to start using OSEE <a href="../launch/osee_launch.php">'OSEE Config & Launch'</a>
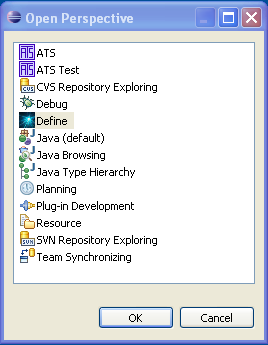
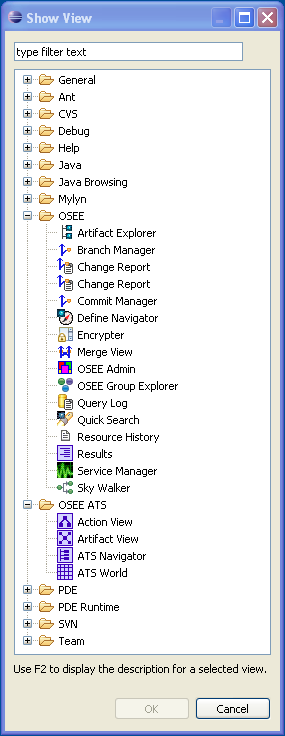
- You can find different OSEE perspectives, such as Define and ATS, and views in correspondent dialogs, activated by menu items 'Window > Open Perspective > Other...' and 'Window > Show View > Other...'.
Supported Databases
Data created and managed by OSEE is persisted into a data store divided into two sections. A relational database to store type, configuration, and simple content and a remote file system to store binary content.
Before you can use OSEE, you will need to select and install a relational database suited for your needs and identify a file system path for binary content storage. If you are new to OSEE and would like to try it out without installing your own relational database, you can follow the link below for instructions on using OSEE's pre-configured server.
OSEE provides support for the following databases:
- <a href="../installation/postgresql_install.php">PostgreSQL</a>
- <a href="../installation/derby_install.php">Derby</a> (install instructions coming soon)
- MySql (install instructions coming soon)
- Oracle (install instructions coming soon)
Alternatively, users may choose to use the pre-configured OSEE Demo server before configuring their own. For launch and configuration instructions visit the following link: <a href="../launch/osee_launch.php">'OSEE Launch Instructions'</a>.
Derby Installation
COMMING SOON
PostgreSQL Installation
Pre-Requisites
* Ensure you have selected the best database for your needs
Instructions
  1. Download PostgreSQL from http://www.postgresql.org/download
  2. Follow PostgreSQL installation instructions
  3. By default, the PostgreSQL database server is configured to allow only local connections. If remote connections are to be allow, edit postgresql.conf and pg_hba.conf to set the necessary permissions. (To setup an unsecured database instance set listen_address to * in the postgresql.conf file and add the following line to the pg_hba.conf file: host  all  all  0.0.0.0/0  trust)
  4. Configure PostgreSQL for OSEE
        1. Launch pgAdmin (in windows Start->All Programs->PostgreSQL*->pgAdmin III)
        2. Double Click on PostgreSQL Database Server (listed under Servers on the left hand side)
              1. If you are prompted for a password type the password selected during installation (user should be postgres by default)
        3. Create an "osee" user
              1. Right-click on Login Roles (at the bottom of the tree on the left hand side) and select "New Login Role..."
              2. Enter the following in the dialog:
                 Role Name: osee
                 Can login should be checked
                 Password: osee
                 Password (again): osee
                 For Role Priviledges - select the following:
                     Inherits rights from parent roles
                     Superuser
                     Can create database objects
                     Can modify catalog directly
              3. Click 'OK'
              4. You should now have an "osee" user under Login Roles
        4. Expand the Databases item in the tree
              1. Create the OSEE database right-clicking on Databases and selecting "New Database..."
              2. Enter the following in the dialog:
                     Name: OSEE
                     Owner: osee
                     Encoding: UTF-8
              3. Click 'OK'
              4. You should now have an "OSEE" Database under Databases
        5. Click on OSEE and then expand it and expand Schemas
              1. Create the "osee" schema:
                    1. Right click on Schemas and select "New Schema..."
                    2. Enter the following in the dialog:
                           Name: osee
                           Owner: osee
                    3. Click 'OK'
                    4. You should now have an "osee" schema under schemas
              2. The relational database is now configured. Proceed to OSEE Database Initialization
Launch Application Server =
Database Initialization =
Launch & Configuration
Concepts and Framework
Artifact
The artifact is the top level object in OSEE. It represents any data object that is to be stored.
Example: a single requirement, a user object, a piece of code (or class), a document
Attributes
Attributes are meta-data attached to an Artifact. They are strongly typed and new types can be added through extension points.
The default attribute "Name" is required for all Artifacts. Other attribute types can be created and associated with any Artifact Type in the system.
Example: Artifact representing a "User" of an application may have attributes such as "Phone", "Address", "City", etc...
Relations
Relations are how one Artifact relates to another. They are strongly typed and have validity defined which allows only appropriate artifact types to be added to the relations as well as the min/max number that are allowed on each side of the relation.
Views and Editors
Artifact Editor
The Artifact Editor is the default editor for the editing of Artifact's attributes and relations. This editor can be opened by double-clicking any artifact or right-click Open With "Artifact Editor".
Attributes Tab
The attributes tab allows for editing of Attributes. All attributes that are valid for the artifact are shown. New attributes can be added by right-click, "Add" and selecting the attribute to add.
Attribute values can be edited by selecting in the attribute value cell.
Attributes can be deleted by right-click, "Delete"
Relations Tab
The relations tab allows for editing of Relations. All relations that are defined as being valid for the artifact are shown. Opening relation groups will show all artifacts that are currently related. Double-clicking a related artifact will open it in it's default editor (normally the Artifact Editor).
Relations can be added by dragging any set of artifacts into the appropriate relation group.
Relations can be deleted by right-click "Delete Relation". This removes the link, but not the artifact.

