Notice: this Wiki will be going read only early in 2024 and edits will no longer be possible. Please see: https://gitlab.eclipse.org/eclipsefdn/helpdesk/-/wikis/Wiki-shutdown-plan for the plan.
Difference between revisions of "CDO Source Installation new"
| Line 5: | Line 5: | ||
Now open a fresh development workspace. | Now open a fresh development workspace. | ||
[[Image:Cdo_install1.png]] | [[Image:Cdo_install1.png]] | ||
| − | + | ||
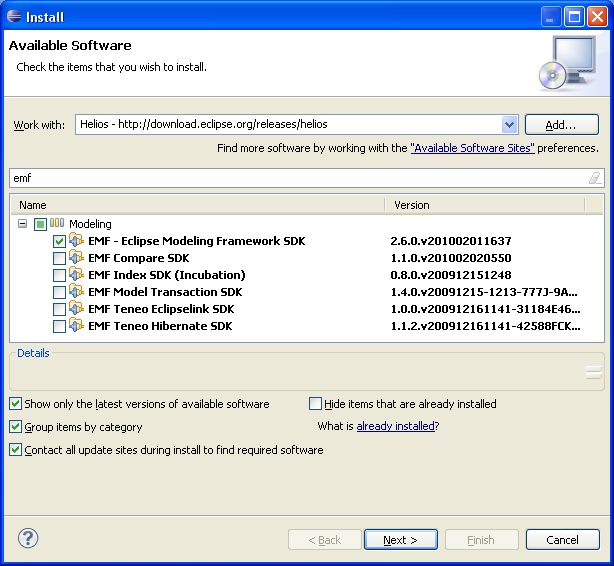
You need to add the following plug-ins from the Helios update site ( http://download.eclipse.org/releases/helios) | You need to add the following plug-ins from the Helios update site ( http://download.eclipse.org/releases/helios) | ||
Note, that as long as helios is not fully released it is recommended to use the staging update site: http://download.eclipse.org/releases/helios | Note, that as long as helios is not fully released it is recommended to use the staging update site: http://download.eclipse.org/releases/helios | ||
| + | Install the following: | ||
+ EMF 2.6 SDK | + EMF 2.6 SDK | ||
+ Buckminster 3.6 Core | + Buckminster 3.6 Core | ||
| Line 15: | Line 16: | ||
+ Buckminster 3.6 PDE Support | + Buckminster 3.6 PDE Support | ||
| − | + | [[Image:Cdo_install2.png]] | |
| + | [[Image:Cdo_install3.png]] | ||
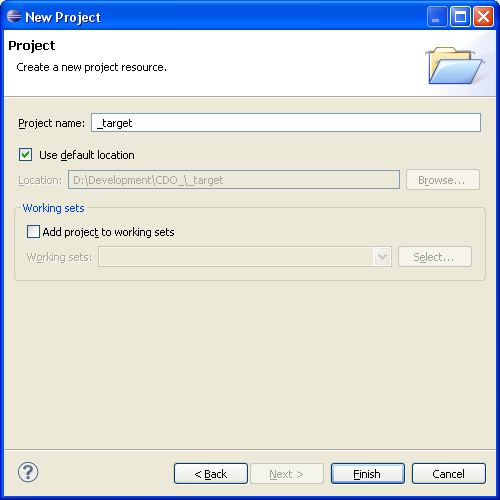
| − | + | After you have installed the required plug-ins just create an empty project called "_target" | |
| + | [[Image:Cdo_install4.png]] | ||
| − | |||
| − | |||
| − | |||
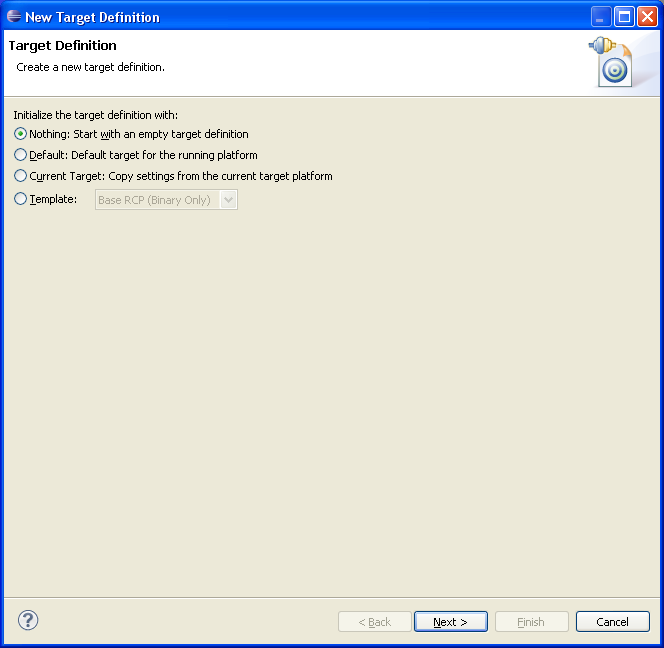
Now create an empty target platform (Windows->Preferences->Plugin Development->Target Platform) | Now create an empty target platform (Windows->Preferences->Plugin Development->Target Platform) | ||
| − | + | [[Image:Cdo_install5.png]] | |
| + | [[Image:Cdo_install6.png]] | ||
| Line 35: | Line 36: | ||
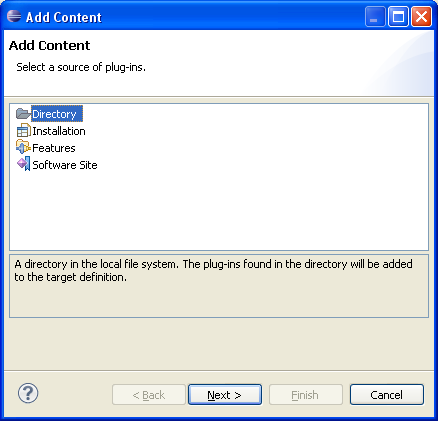
Switch to the content tab. | Switch to the content tab. | ||
| − | + | [[Image:Cdo_install7.png]] | |
| + | |||
| + | |||
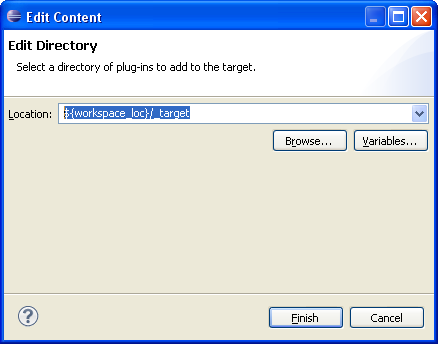
Add the directory location $workspace_loc\_target and activate target platform | Add the directory location $workspace_loc\_target and activate target platform | ||
| − | + | [[Image:Cdo_install8.png]] | |
| + | |||
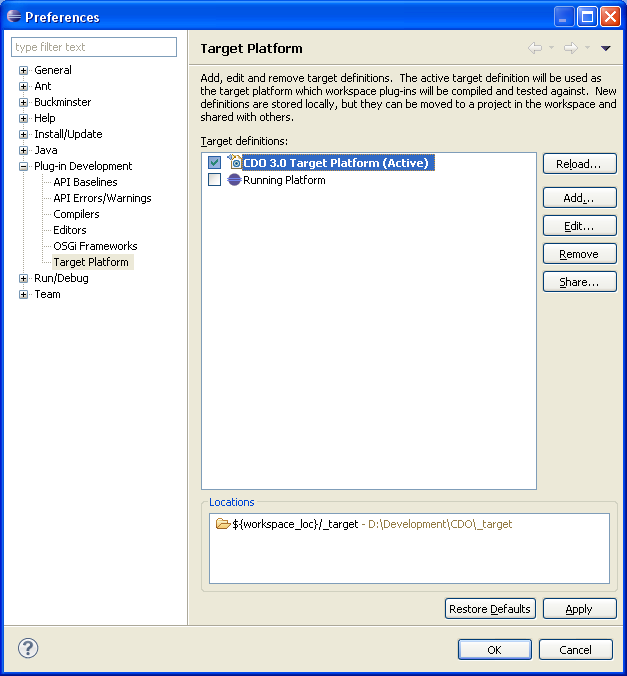
Activate the platform | Activate the platform | ||
| − | + | ||
| + | [[Image:Cdo_install9.png]] | ||
| + | |||
Revision as of 00:28, 19 March 2010
This tutorial describes how to install the CDO workspace using buckminster.
First step to do is to download and install Eclipse 3.6 from http://download.eclipse.org/eclipse/downloads (archive)
Now open a fresh development workspace.

You need to add the following plug-ins from the Helios update site ( http://download.eclipse.org/releases/helios)
Note, that as long as helios is not fully released it is recommended to use the staging update site: http://download.eclipse.org/releases/helios Install the following: + EMF 2.6 SDK + Buckminster 3.6 Core + Buckminster 3.6 CVS Support + Buckminster 3.6 PDE Support


After you have installed the required plug-ins just create an empty project called "_target"

Now create an empty target platform (Windows->Preferences->Plugin Development->Target Platform)


Switch to the content tab.

Add the directory location $workspace_loc\_target and activate target platform

Activate the platform

Now you need to bootstrap the releng project.
http://dev.eclipse.org/viewcvs/index.cgi/org.eclipse.emf/org.eclipse.emf.cdo/releng/org.eclipse.emf.cdo.releng/psf/pserver/_bootstrap.psf?root=Modeling_Project&view=co Commiters use: http://dev.eclipse.org/viewcvs/index.cgi/org.eclipse.emf/org.eclipse.emf.cdo/releng/org.eclipse.emf.cdo.releng/psf/extssh/_bootstrap.psf?root=Modeling_Project&view=co
Right the package Explorer and choose Imort->Team Project Set. Select the downloaded _bootstrap.psf
Note, if you want to work on CDO 2.0 switch the branch with Team|Switch to "R2_0_maintenance" branch (not tag!)
To import the sources right-click the local.mspec, select Buckminster|Import...
Go and fetch a coffee, or two, or three... Finally hit the ‘Finish’ button